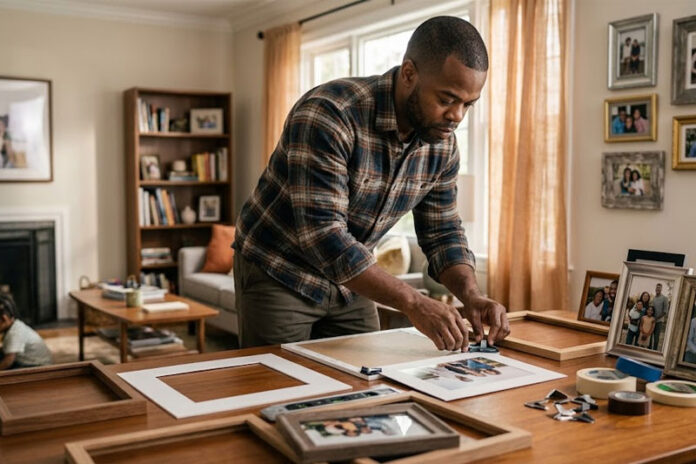

Family photos capture priceless historical moments that deserve careful preservation and beautiful presentation inside your living spaces. Converting loose paper prints into stunning wall displays requires thoughtful planning, proper assembly tools, and correct handling techniques.
Homeowners can easily achieve museum-quality framing results by learning standard mounting steps and choosing proper archival materials. Quality frames convert ordinary family snapshots into durable heirlooms that safeguard rich family history across generations.
Choosing the Right Frame Material
Wooden picture frames provide natural warmth and timeless elegance that blend seamlessly with vintage black-and-white portraits or colorful modern prints. Solid hardwood varieties like oak, walnut, and cherry offer structural strength while adding rich natural textures to your home interior decor.
Sturdy frame construction keeps ambient room moisture away from delicate photo paper during seasonal weather shifts. Selecting durable outer framing stock stops warping or bending when indoor humidity levels rise and fall throughout changing months of the year.
Matching frame colors to subtle undertones present in your photograph creates a unified aesthetic across your display wall. Neutral wooden or metal borders allow the main focal subject to capture immediate attention without overwhelming viewers or cluttering room design.
Selecting High-Quality Matboard
Matting provides clean visual separation between your photo and the surrounding frame edges. Bright white, soft cream, or light off-white mat shades direct viewer attention straight toward facial expressions in detailed family group portraits.
Official archival guidance indicates that matting prints in high-quality ragboard or matboard offers the safest path for long-term storage. Pure cotton rag composition prevents chemical discoloration that turns older paper prints yellow as years pass.
Standard paper mats contain acidic compounds that leach into delicate photo fibers during indoor temperature changes. Investing in conservation-grade mounting boards protects historic family pictures from fading or deteriorating inside closed frame assemblies over decades.
Utilizing Proper Glazing Options
Clear glazing shields fragile photographic paper against room dust, unwanted humidity, and accidental surface scratches. Standard clear glass panes provide cost-effective protection inside interior rooms that feature indirect lighting conditions.
Bright room environments require specialized glass panels to prevent fading and harsh surface glare. Choosing professional picture framing gives your favorite prints superior protection against damaging solar light rays. Premium acrylic panes offer a lightweight option that resists breaking in active household spaces with young children or pets.
Anti-reflective glass treatments allow natural image colors to shine through without annoying overhead ceiling light reflections. High clarity glazing keeps every fine facial feature sharp and visible from anywhere across your living room space.
Preventing Direct Glass Contact
Direct contact between photographic paper and glass panes causes severe sticking over extended display periods. Trapped moisture creates permanent water spots, discoloration, and surface damage on glossy photo paper finishes.
Federal preservation experts recommend using a window mat or spacers so the glass or acrylic is not touching the surface of the original. Separating internal components creates a small air gap that lets delicate paper expand and contract naturally during environmental shifts.
Clear plastic frame spacers slip neatly along interior moulding tracks when window mats are omitted from frame designs. Implementing physical separation stops surface sticking and prevents costly physical damage to irreplaceable original family photographs.
Securing Pictures with Safe Adhesives
Standard pressure sticky tape leaves gummy residue that permanently ruins photo paper borders. Harsh chemical adhesives bleed through delicate paper fibers, leaving dark yellow stains on front photo surfaces after several months.
Archival mounting corners secure original prints firmly without placing sticky glue directly onto photographic paper. Corner mounts allow easy photo removal whenever you want to update frame designs or switch display layouts.
Safe picture mounting choices include:
- Archival paper photo corners that support picture edges without direct glue contact
- Reversible museum mounting strips built for supporting heavy oversized paper prints
- Acid-free water-activated linen tape placed along top photo margins
Measuring and Cutting Mats Accurately
Accurate measurements prevent crooked picture placement and uneven border widths inside custom frames. Measuring artwork dimensions prior to cutting board stock preserves raw materials and eliminates extra trips to local craft supply stores.
A sharp bevel mat cutter forms clean angled edges that give mounted prints an elevated gallery appearance. Applying firm downward pressure along a heavy steel straightedge yields smooth cuts without tearing thick matboard fibers.
Standard window mat borders measure 2 inches or wider to establish balanced visual proportions around family photos. Larger portraits benefit from wider mat margins that create strong visual focus on expansive home display walls.
Hanging Your Framed Wall Displays
Eye-level placement creates optimal viewing angles when arranging family gallery walls inside living rooms or hallways. Mounting picture frames roughly 57 inches off the floor matches standard gallery hanging standards for comfortable viewing by all guests.
Heavy wooden frames require sturdy wall anchors or direct installation into solid wooden wall studs. Dependable mounting hardware prevents accidental falls that shatter glass covers and ruin custom picture frames.
Arranging multiple picture frames requires consistent spacing across your entire wall layout. Leaving 2 to 3 inches of open space between frame edges maintains structured balance across multi-photo display walls.https://pixabay.com/photos/frame-picture-frame-photo-frame-2735651/
Transforming personal memories into gallery-quality wall displays requires proper archival supplies and careful preparation steps. Following these practical framing practices keeps valuable family prints safe while showcasing them proudly inside your home.
Frame your favorite family moments today to share lasting visual memories across generations. Smart mounting choices turn simple paper snapshots into cherished heirlooms that stand the test of time.